Procedures to move Salik Tag to a New Vehicle
While transferring your Salik tag to a new car is a simple procedure, there are some procedures you must do to make sure everything is done correctly. A thorough tutorial on transferring your Salik tag to a new car may be found below.
Gather Necessary Documents and Information
Make sure you have all the required paperwork and information ready before beginning the transfer procedure. You’ll require:
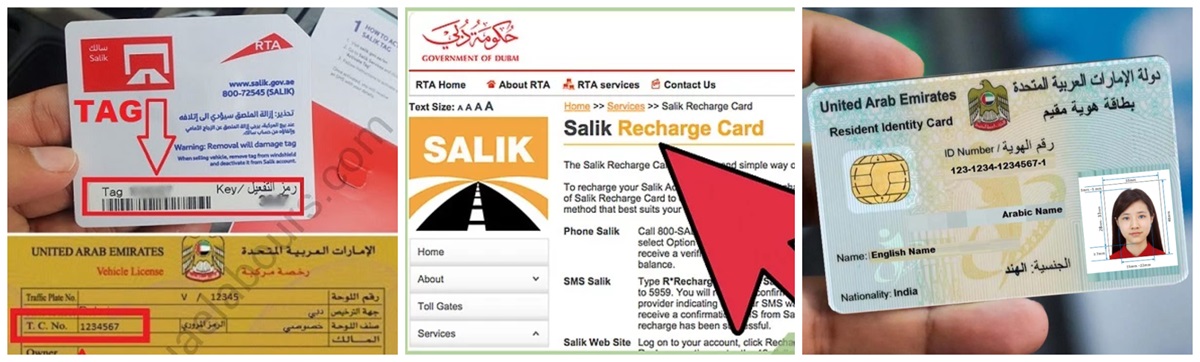
- Salik Tag Number: Your Salik tag’s unique identification number is this.
- Activation Key: Typically, the tag itself has this key printed on it.
- Vehicle Registration Card: This is necessary if you want to transfer the tag to another car.
- Emirates ID: Required for identification purpose.
When you update the details on your Salik account, the transfer process will go more smoothly if you have these documents available.
Remove the Salik Tag from Your Old Vehicle
Eliminating the tag from your previous car is the first step in the Salik tag transfer procedure. This is important because a Salik tag needs to be deactivated before it can be transferred to another car. To take the tag off:
- Use the Smart Salik App or the Salik website to log into your Salik account.
- Go to the vehicle management area.
- Choose the option to unlink the car from the previous Salik tag.
- Verify the removal, which is usually done at no cost.
By doing this, you may make sure that the previous car is no longer associated with your Salik account, which will shield you from any unapproved charges when the new owner utilizes the car.
Download Smart Salik App on App store and Google Play Store
![]()
![]()
Update Your Vehicle Information on the Salik Website
You can change your car information on the Salik website or app when the old vehicle’s Salik tag has removed. Take these actions:
1. Open your Salik account and log in.
2. Click on the “Add a new vehicle” option.
3. Type in the necessary information, such as the Salik tag number, activation key, and registration number of the new car.
4. Check all the details, then send in the change.
Online completion of this process usually takes ten to fifteen minutes. To prevent any problems, you must make sure that your new car registered under your traffic file.
Install the Salik Tag on Your New Vehicle
You must place the Salik tag on your new car after successfully adding the new vehicle details to your Salik account. This is how you do it:
- Take out the Salik tag from the container.
- Wipe down the portion of your car’s windshield where the tag is going to attached.
- For the best reading by the toll gates, firmly attach the Salik tag to the windshield, preferably behind the rearview mirror.
Although it is not advised, you can store the Salik tag in your glove box if you would rather. The system can read your car’s license plate and deduct tolls.

Test the Salik Tag and Verify Proper Functioning
It is essential to test the Salik tag after installation to make sure it is operating properly. One way to accomplish this is to drive through a Salik toll gate.
Keeping an eye out for any deductions from your Salik account to make sure the tag is working. Check that all of the car information is accurately updated in your Salik account if you run into any problems, such as the tag not being recognized. For assistance, get in touch with Salik customer service if issues continue.
You can successfully transfer your Salik tag to a new car by following these instructions, which will guarantee that you continue to pay tolls and have a smooth driving experience on Dubai’s roads.